Bioelectrical Impedance Analysis
Conducting the BIA Test

|
Bioelectrical Impedance Analysis Conducting the BIA Test |
|
Bioelectrical impedance evaluation using a portable, single-frequency, tetrapolar machine is safe for the client[78] and easy to perform in a standardized, reproducible fashion.
Additional equipment may be required, depending on the client, to complete the process. You should also have a pen or pencil and piece of paper handy to record readings as you take the measures.
|
To conduct BIA tests properly, you will need the following items:
|
 |
To start, an accurate height is the most crucial measure in assuring accuracy of the reading and evaluation. Both heights and weights should be taken without shoes and with minimal clothing whenever possible. If you are working with a population that is difficult to measure for standing height, you can use knee height (measured with knee height calipers) to estimate height. | |
| Weight measures should be taken to the closest 0.5 pounds or 0.1 kilograms. If the client cannot stand to take a proper weight, a bed scale or knee-height estimate of weight can be used.[79] | ||
| To estimate weight from knee height, you will need to conduct additional anthropometry. The equations for knee height calculate weight using arm circumference (AC), calf circumference (CC) and knee height (KH) in centimeters and subscapular fatfold (SFF) in millimeters. Equations are as follows: |
|
|
The wrist circumference should also be taken to determine a frame size and allow you to more precisely evaluate BIA results (see interpretation section).
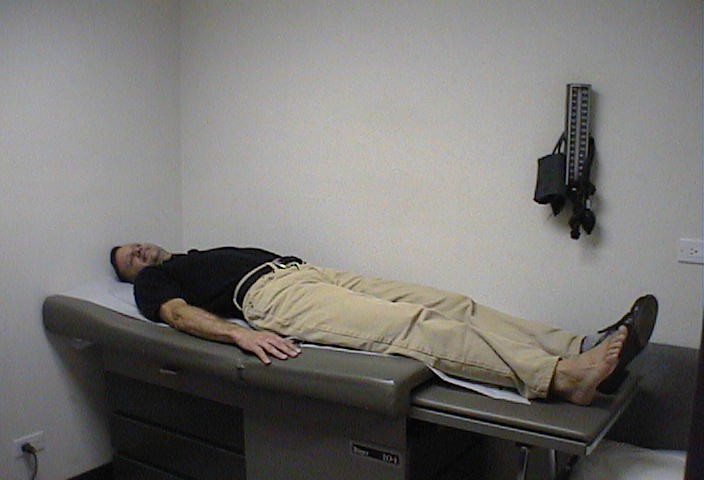
Your client should be asked to remove their right sock and shoe and lie supine on a non-metal, non-cement surface with their arms and legs slightly apart (not touching).
 (click on picture to see a larger image)
If their arm and/or leg skin is not adequately insulated from touching (and possibly misleading electricity), place a small towel between the arm and torso and/or between the legs. Any jewelry that may be close to the sending or receiving electrodes should be removed.
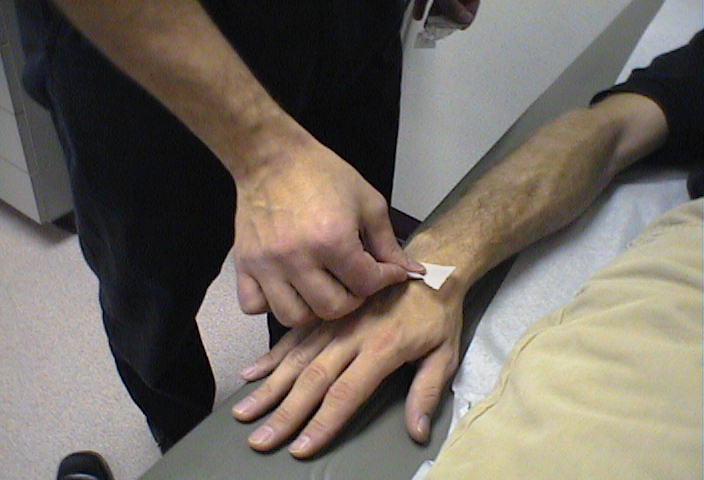
Use alcohol swabs to clean the areas where the electrodes are placed.
 (click on picture to see a larger image)
Excess body oils, dirt, lotion, and other substances that may accumulate should be removed using alcohol swabs. Wait for the alcohol to dry or wipe the areas dry with gauze or other drying material prior to electrode placement.
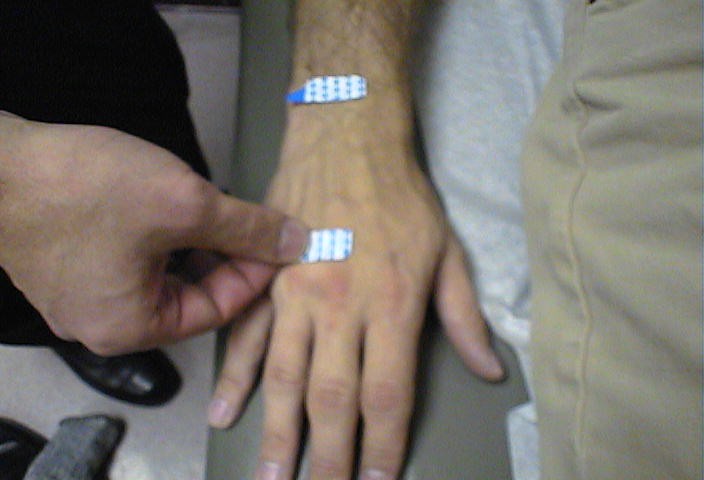
Electrodes should be placed according to standardized measures. Gold, silver or tin foil electrodes (with electrode gum) are placed on the hands and feet. The wrist-receiving electrode is placed along the line that bisects the styloid processes of the ulna and the radius.
|
.
The hand source electrode is placed at the knuckle on the surface of the hand (ask the client to make a fist and place the electrode at the large knuckle on the dorsal surface of the hand).
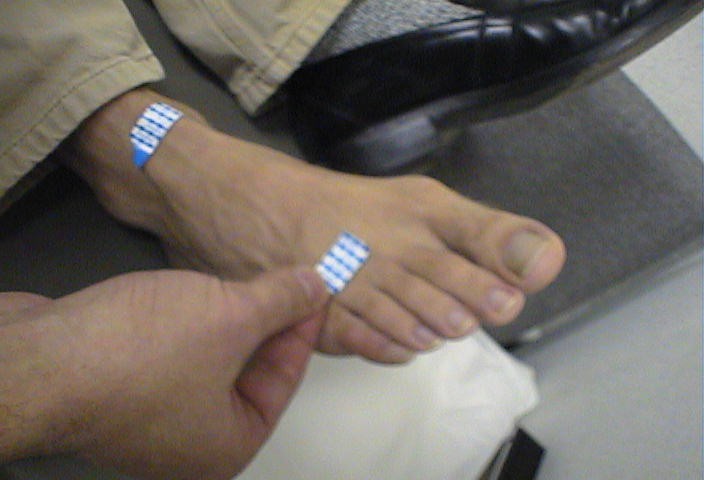
The receiving electrode on the foot should be placed on the dorsal surface of the ankle along the line that bisects the medial and lateral malleoli of the ankle. The foot’s source electrode is placed between the middle toes at the level of the sesamoid bone.
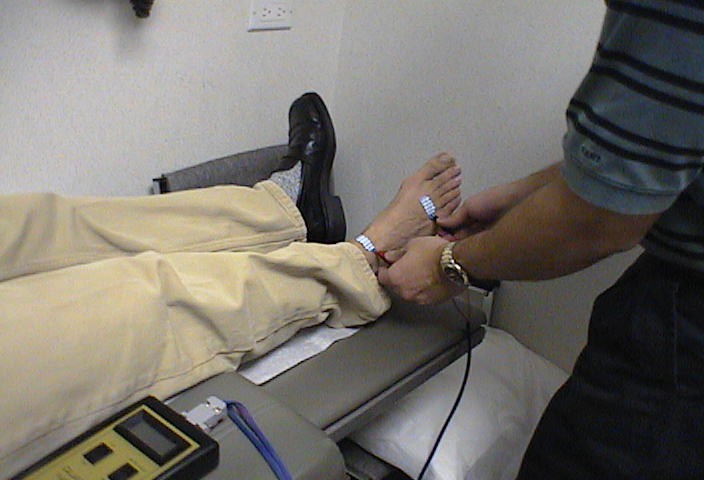
Displacement of the source electrode at the knuckles and near the toes by 1 centimeter can result in a 2.1% underestimation of resistance and two misplaced electrodes can alter the resistance reading by 4.1%. Electrodes should be placed at least 4-5 cm apart on the hand and foot. Once the client is prepared (as above) you may clip the appropriate leads to the electrodes for the BIA reading. The hand source lead is clipped to the knuckle electrode and the receiver lead is clipped to the wrist electrode. Likewise, the foot source lead is clipped to the electrode nearest the toes and the receiver is clipped to the ankle electrode. You can check to make sure that the clips are attached and that the electrodes are appropriately stuck to the skin by giving a slight (very slight, please) tug to the leads.
Any electrodes that fall off or become disconnected should be removed and discarded and a new electrode should be placed following the instructions above. If the client’s skin is exceptionally dry, try adding electrode gel to the electrode surface prior to attaching it. If the client has very oily or sweaty skin, you may have to re-clean the surface with an alcohol swab before placing the new electrode. Now it is time to turn on the machine.
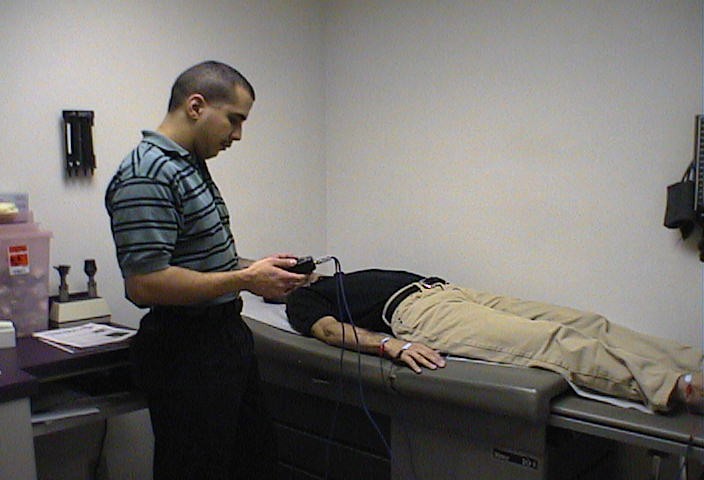
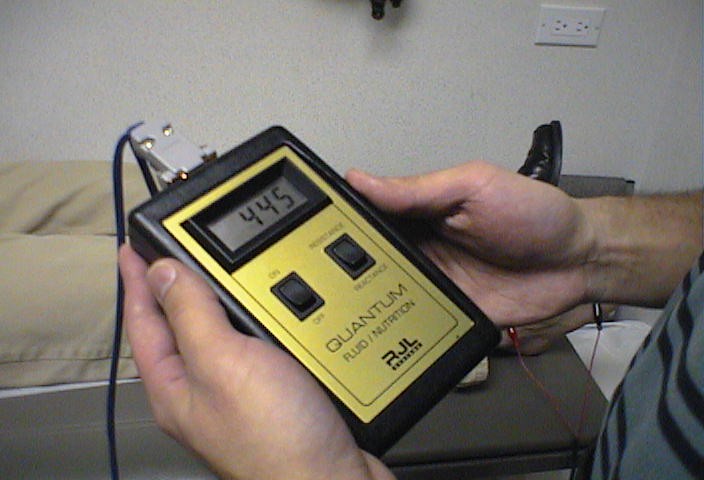
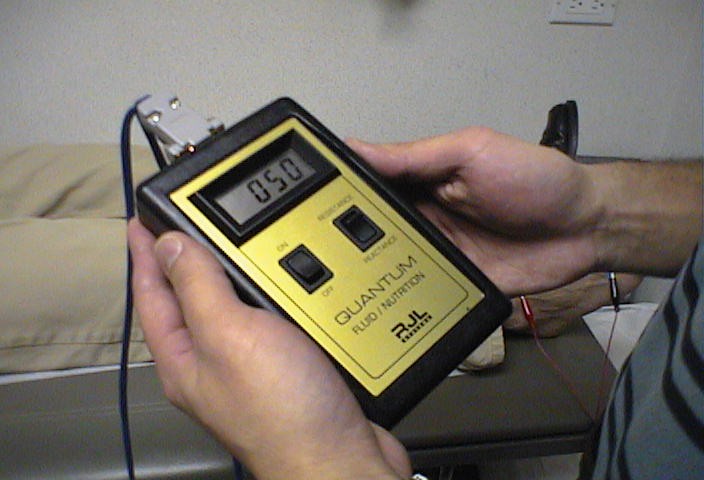
Depending on the machine you have, you may have to punch in some data, such as the client’s height, sex, weight, and other information. You can then obtain the resistance and reactance readings and write them down right away. The resistance [R] reading is three digits and generally between 200 and 800.
The reactance [Xc] reading is usually two digits between 20 and 100.
For additional assurance that you obtained a good reading, you can turn the machine off, check to see that everything has been attached properly, and retake the reading. It should match your original reading within 2-5 ohms for each reading. If it does not, trouble shoot your methods and try it again. At this point, you can turn off the machine, unclip the leads, and remove the electrodes. The client can then be instructed to replace their sock and shoe. You can then enter the reading into equations and report the results. Troubleshooting is the next section Back to Table of Contents References[78] Geddes LA, Baker LE. Principles of Applied Biomedical Instrumentation. Third edition. New York, NY:John Wiley & Sons; 1989. [79] Chumlea WC, Guo S, Roche AF, Steinbaugh ML. Prediction of body weight for the nonambulatory elderly from anthropometry. J Amer Diet Assoc. 1988;88(5):564-568.
|
Copyright © 2001, Hi-R-Ed.org. All courses posted on this site are the property of Hi-R-ed.org unless otherwise stated. Courses may not be copied or transferred in electronic, printed, or other forms or modified for any purpose without explicit written consent of Hi-R-Ed.org or the copyright owner.If you are having problems with this website, please contact the webmaster. |